
My name is Neil Schneider and I serve as Executive Director of The International Future Computing Association (TIFCA). Our mission is to develop frameworks and initiatives that enable technology adoption. Before working for TIFCA, I was the founder of Meant to be Seen (MTBS); an online community of gamers that are passionate about stereoscopic 3D entertainment, immersive experiences, and of course virtual reality. Over the years at MTBS, I developed a knack for spotting industry gaps and a passion for trying to find ways to seal them.
Let it be known that I love my toys! I game too long with my PC and my VR headset, I shake the house with my nine speaker surround sound setup, and I much prefer my private home theater with authentic movie theater seats than spending a small fortune on popcorn and soda in the company of strangers. Part of the fun is to find creative ways to get my equipment to work together and to stretch my hard earned dollar by maximizing performance and capability.
This year, my home theater passed a generational torch with the purchase of a BenQ X3000i 4K projector. It represents a whole new era of capabilities and challenges that I am learning about for the first time. From installation to content usage, the process I’ve gone through has taught me so much that I decided to share my experiences here. This article goes well beyond the confines of my shiny new projector! This is really about understanding what consumers like me are experiencing with modern AV equipment, content, stereoscopic 3D, and getting value for our dollar. I’m hoping that what I share here will in some way contribute to improving the home entertainment industry I count on for so much.
My Story Begins With Panasonic
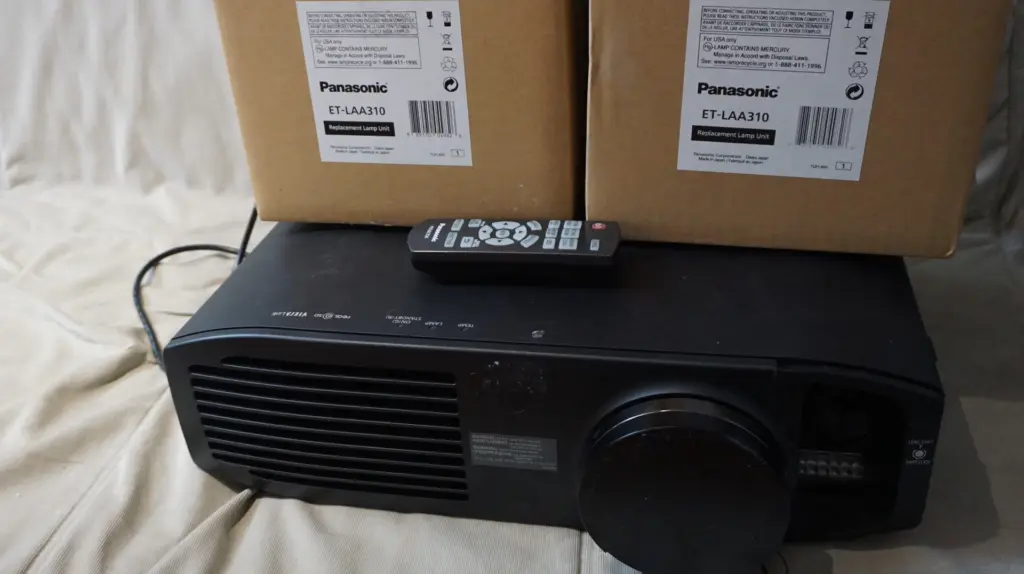
Back in the early 2010s in heyday of S3D televisions, Panasonic sent an AE7000 cinema projector for my work at Meant to be Seen. With 1080P resolution it had crystal clarity, the color balance looked great, and even when the industry upgraded to 4K HDR, it was worthwhile to find creative ways to get modern content running on my prized display. Combined with my 110” screen, there still is no better way to watch movies or play video games. If the right TV show was on, it didn’t matter what my family wanted – we were watching it on the projector!
The Panasonic was rich with innovative features too. Horizontal and vertical lens shift made it possible to get the image on the screen without any distortions. Zoom and focus were adjustable from the remote control. Frame interpolation smoothed out the video to make it look more realistic. Menus were filled with color calibration tools and adjustments. Ahead of its time, the AE7000 was a beast. I’m told that some Hollywood movie producers still use it today even with broken parts – and I believe it.
Unfortunately, nothing lasts forever. As innovative as the AE7000 was and still is today, it’s an LCD projector. LCD projectors work by shining light through individual red, green, and blue polarizers to complete a finalized picture. The bright light source (usually halogen) is hot, and over time, it can singe the polarizers to the point of having a blotchy off-color image. Once the damage is done, it’s more cost effective to replace the projector with something else because a new bulb won’t cut it.
This was the fate of my poor Panasonic. Dark scenes had taken on a green tinge, the white uniformity was plagued with yellowing pinkish blotches, and replacement bulbs just contributed to highlighting the problem areas.
Still, I got 10 years out of the projector with 8,000+ hours on the clock. Whatever comes next has big shoes to fill!
Introduction: The BenQ X3000i
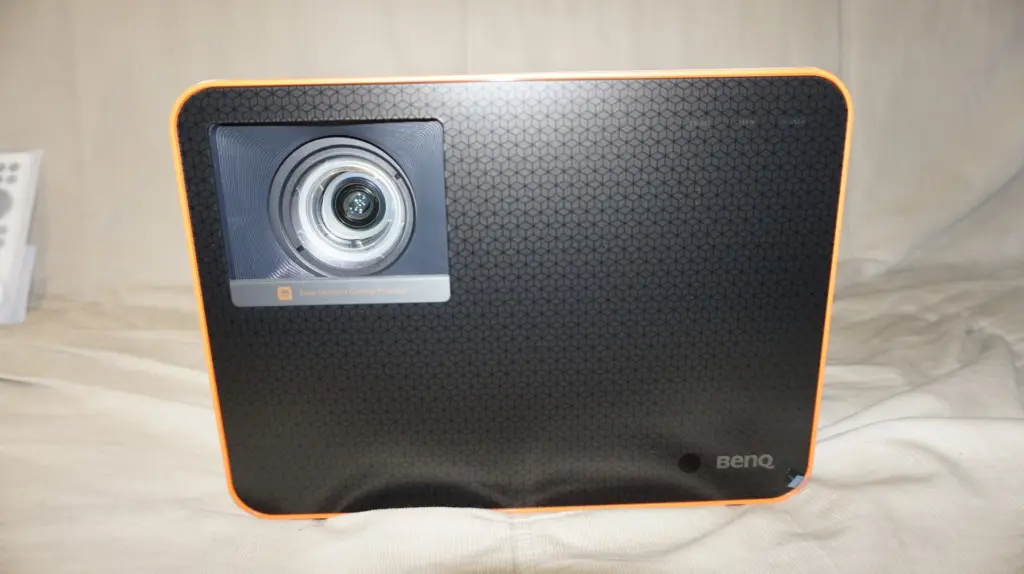
Touted as one of the best gaming projectors available today, the BenQ X3000i is already well reviewed by countless sources with color calibration tools that are beyond my expertise. For me, it’s a generational change in technology. Is 4K worth it? Is HDR everything it is cracked up to be? Does projection still have a future? Let’s find out.
Quick projector specs:
- • Provides 4K UHD (3840 X 2160 resolution) at 60Hz
- • DLP Pixel Shifting
- • 3,000 ANSI Lumens
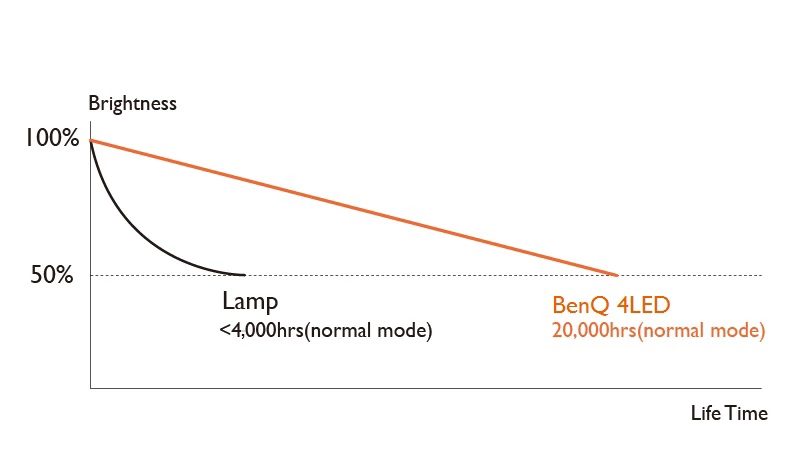
- • 4LED light source, 20,000 – 30,000 hour life (normal vs eco mode)
- • HDR10 and HLG support
- • 30-bit display (1.07 billion colors)
- • Stereoscopic 3D support (up to 1920 X 1080 X 120Hz content, SDR only)
- • 1.15 to 1.5 throw distance, 1.3X Zoom
- • 110% projection offset
- • 5 watt built in speakers
- • eARC, Dolby Atmos Return
- • BenQ streaming stick included
Projector Installation Experience
The BenQ X3000i is a long-throw projector meaning that it needs a sizeable distance from the screen to make the image large enough to properly fit. It is designed to work with screens up to 150” diagonal. If the screen is too large, the projector will be too far back, and its brightness may not be high enough for a pleasing image.
When it comes to getting a sharp image on the screen, the projector’s lens needs to be perfectly parallel with the screen. Any horizontal or vertical tilt contributes to trapezoidal shapes or image anomalies. Projector lens shift overcomes this challenge by redirecting the image from within the lens, but the BenQ X3000i has no such capabilities. There is a digital keystoning option, but this reduces the overall image quality because it is more a post processing effort than a manipulation of the actual pixels. BenQ also warns of added latency when taking advantage of the keystoning feature. Try to avoid this function at all costs. This projector requires a clean install the first time.
When judging the mounting distance from the screen, I learned that it’s best to find a location where the optical zoom is used to only 50% of its range because the higher the zoom (zoom grows the image size), the more brightness is lost from the projector. If you don’t use zoom at all, it could contribute to some contrast loss.
If the projector is sitting on a table in front of you, the image will likely be comparable to a big HDTV, and that defeats the whole purpose of owning a projector such as this. Many put the projector on a tall shelf behind them. However, unless the shelf is at the correct height, you can still end up with those trapezoid shapes – especially if you tilt the projector with its adjustment legs.
The best option is usually a ceiling mount. However, the projector has to be at the perfect height and horizontal alignment. The lens is also offset to the right and projects downward rather than straight forward – so you really need to think things through in advance. The manual has drawings that show the desired height for the projector and its beam path.
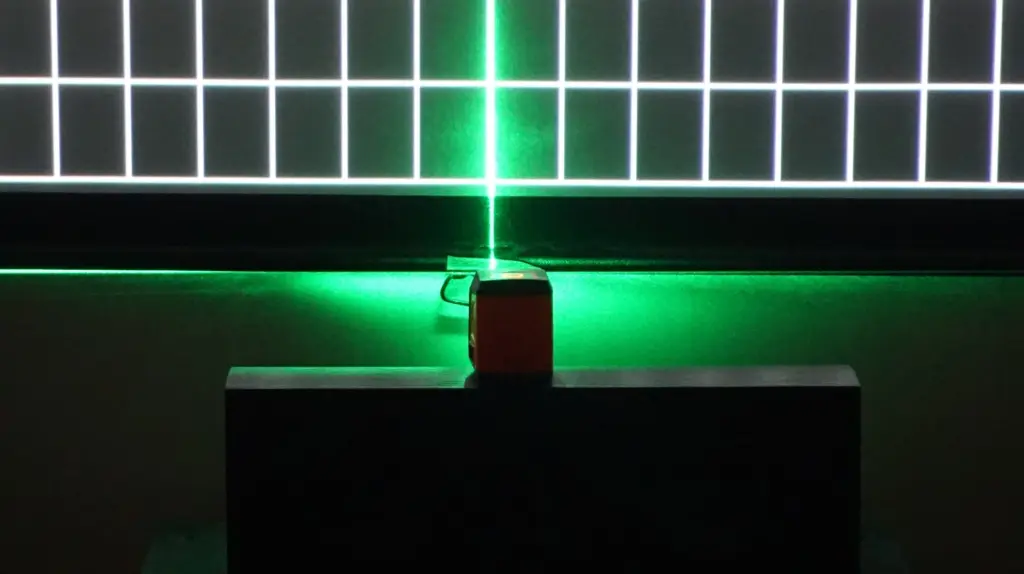
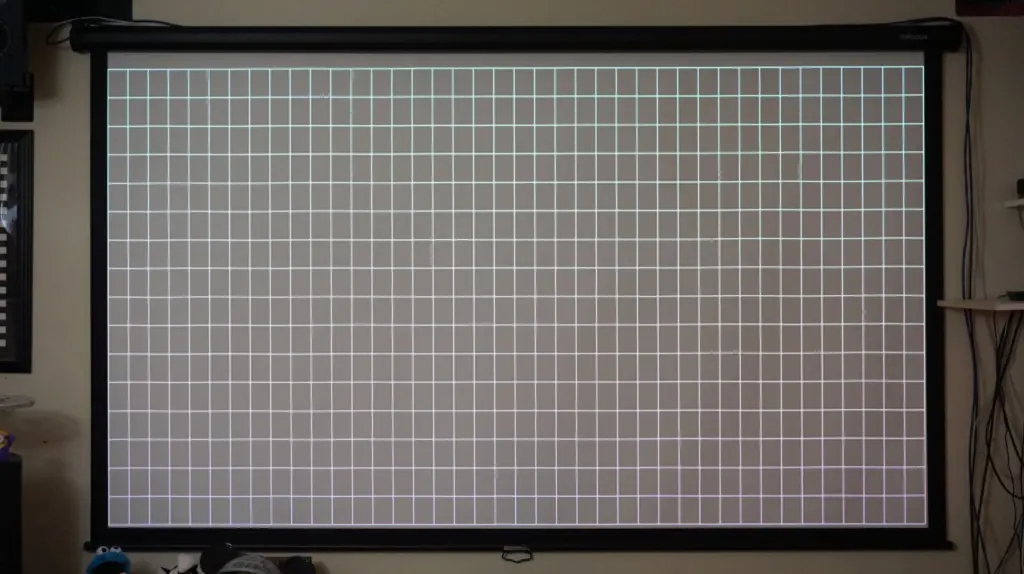
I strongly recommend getting a laser level so you can very closely approximate where the lens is pointed relative to your screen. You want (need) it to be dead center with minimal swiveling or tilting. You can also use the laser to check for unwanted anomalies and image curvatures of your screen (or wall) using BenQ’s test image. It will be hard to achieve perfection – but this will get you very close.

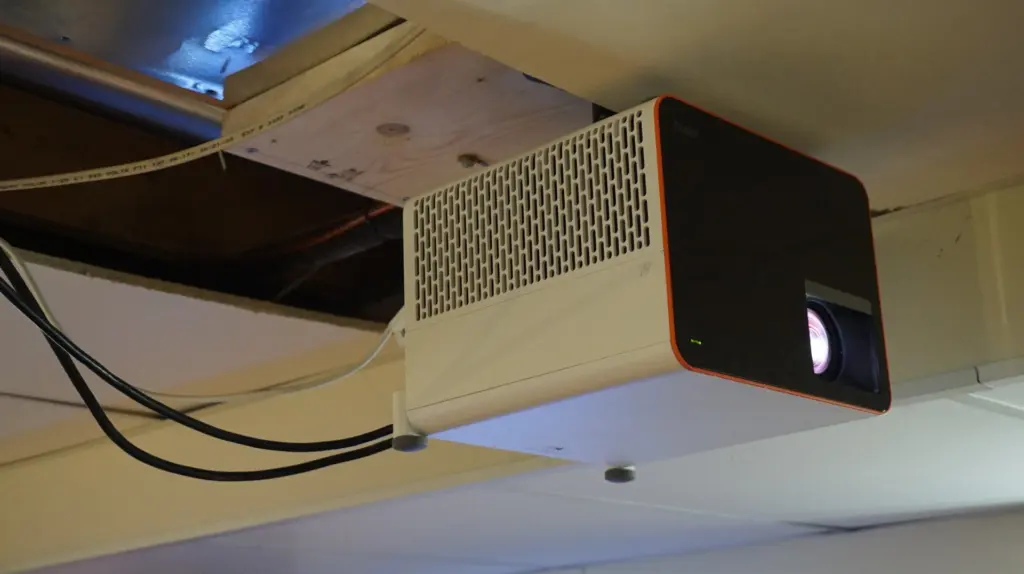
Out of all the projector ceiling mounts available, I recommend the Kanto P101 ceiling mount. First, it’s a low-profile mount that could place the projector just 3” below the ceiling. That’s important because if the projector is too low, you will be forced to tilt it upward to get the image on screen (if the screen can’t be moved lower to compensate). While it can be mounted lower, you can accurately supplement the placement with extra wood shims as needed.
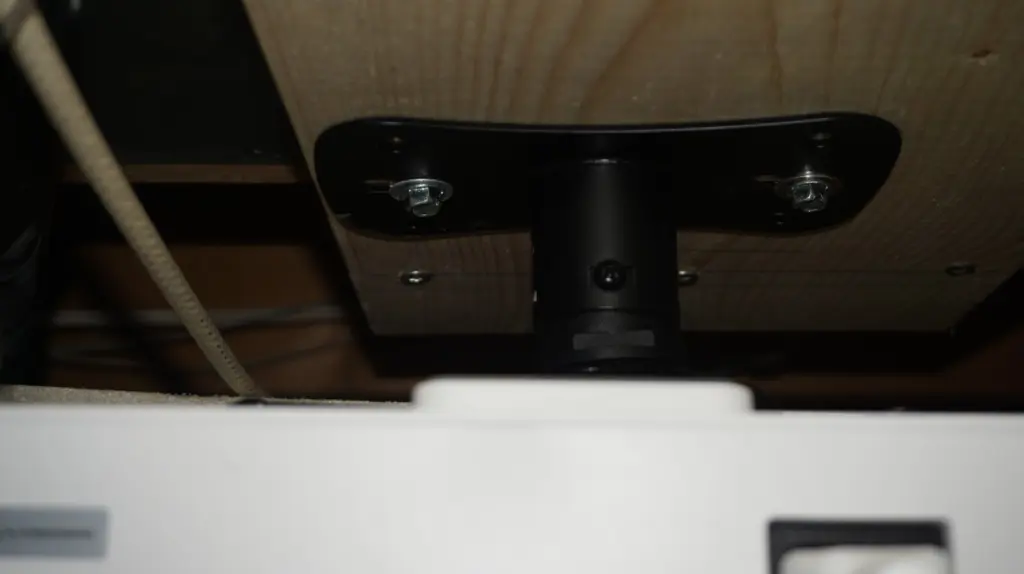
To avoid swiveling, the Kanto P101 has a secret weapon – the two elongated screw holes on its bracket. Using two bolts, you can secure the projector with the bracket, align the projector and bracket by carefully sliding it along the screw holes, and finalize the position by fully tightening the bolts and adding extra screws as needed. Please be cautious when judging the tightness and sturdiness of the bolts as well as the materials they are drilled into – you don’t want your prized projector falling off your ceiling…and on your head!
The stringency of installing the BenQ X3000i is its biggest caveat. In my household, the placement was so inflexible that we were limited to mounting on the one joist that is inches away from our natural gas and air conditioning duct lines. If it wasn’t for the Kanto P101 mount flexibility and the height of the joists above our drop ceiling, I may have had to return the projector.
Installation is definitely a two person job – don’t be a hero!
Why LED Projection Matters
Bulb-based projectors have their share of challenges. First, they need the opportunity to warm up and cool down; it could take a few minutes before your image looks its best. Bulb life could also be reduced just by turning the projector on and off; some people recommend leaving a projector on longer than needed for this reason. Bulbs also get dimmer with time; when a bulb has reached the end of its life expectancy (e.g. “X Hours”), it means its brightness is 50% less than where it started. Bulbs also put out an enormous amount of heat. Cooling the projector could attract dust and contaminants combined with the inconvenience of cleaning out and replacing filters. Fan noise could be distracting too. At the end of the day, I would have gladly bought more bulbs for my old Panasonic AE7000 if its polarizers were more easily repairable.
The BenQ X3000i is a DLP LED projector. The LED light source doesn’t require the same level of cooling that a bulb projector needs which means it doesn’t require air filters or cooling functions that expose its insides to dust and contaminants. Unlike my Panasonic’s poor polarizers, I suspect that the cooler nature of LED will translate to components that will either last longer or be easier to repair / replace.
While the LED light source is supposed to gradually decline with age, BenQ automatically color calibrates the image so it retains its quality with the passage of time – we’ll have to wait and see on that!
According to BenQ’s website, the light source is supposed to last for the life of the projector, but it is possible to replace it if serviced. 20,000+ hours is easily two to three times the projector use I enjoyed from my Panasonic AE7000.
A Box of Entertainment Value
To get the most out of content providers like Netflix, Disney Plus, and Amazon Prime Video, you usually need to buy a streaming stick solution like Amazon FireTV, Nvidia SHIELD, Google Chromecast + TV, etc. These products connect to the Internet, log in to your favorite content sources, and send the video feed to your display through HDMI. It’s helpful to also have a surround sound receiver so you can connect multiple sources like a streaming stick, cable box, and blu-ray player and conveniently switch between them as needed.
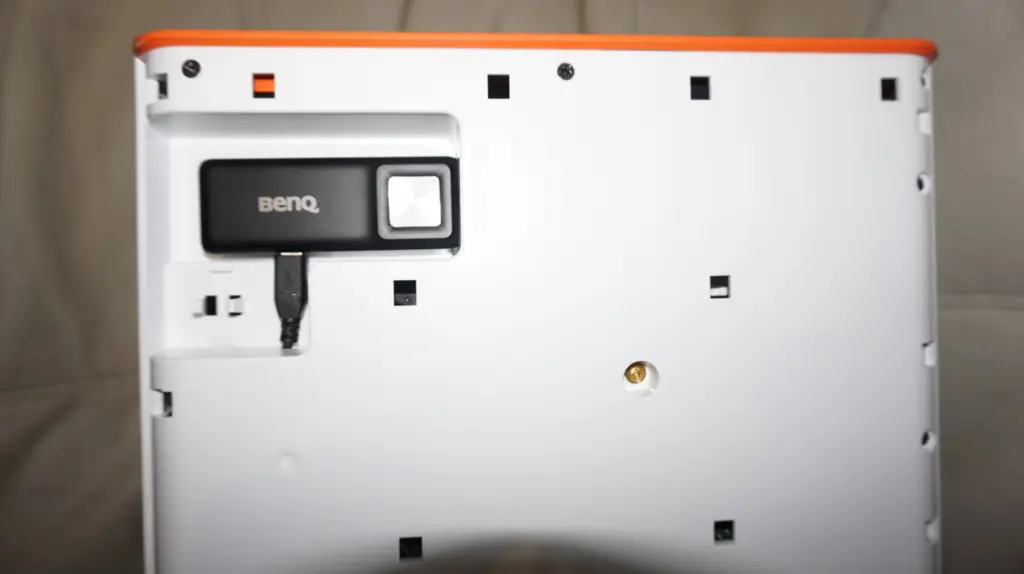
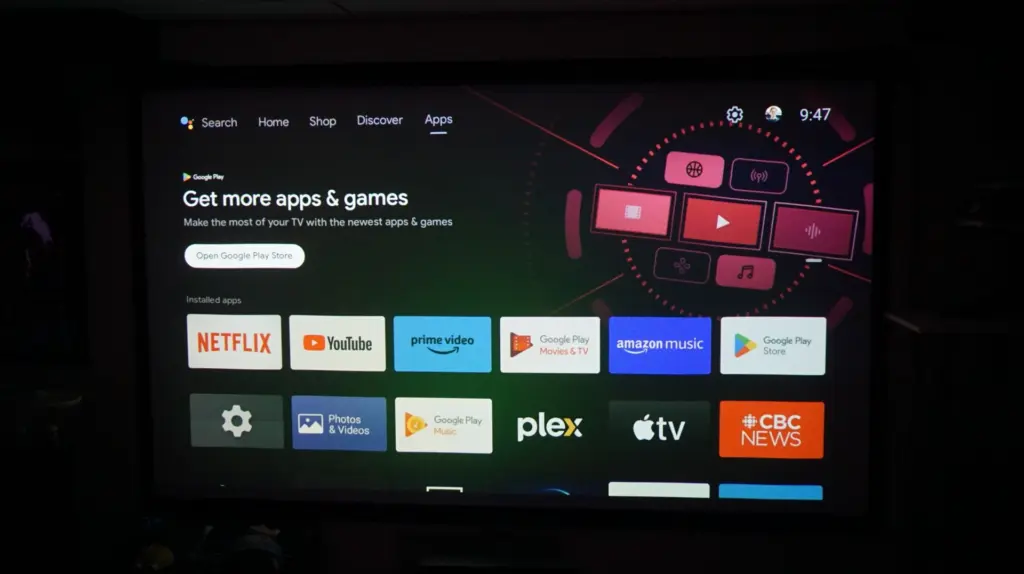
If you don’t yet own a surround sound receiver or a streaming stick, the projector comes with a BenQ Wi-Fi-driven streaming solution that gets installed in an internal compartment. Based on the Android operating system, BenQ’s stick supports many of the leading streaming content providers with the exception of Netflix. BenQ does have a custom Netflix app for the projector, but as of this writing, the support is too visually limited to really be qualified (e.g. low resolution, no HDR support, etc.).
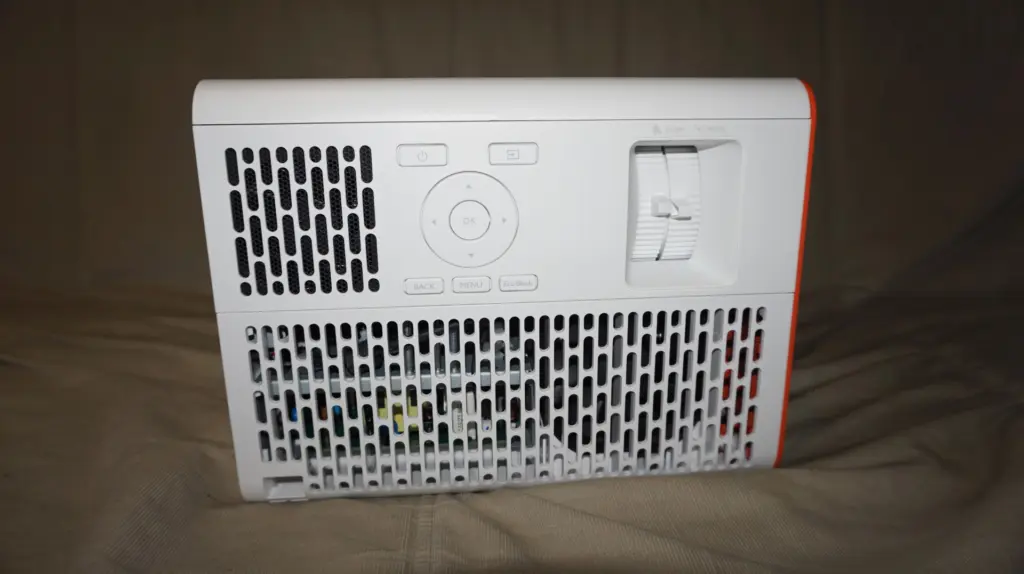
In addition to BenQ’s streaming stick, the projector also includes two HDMI ports for other sources like a cable box and games console.
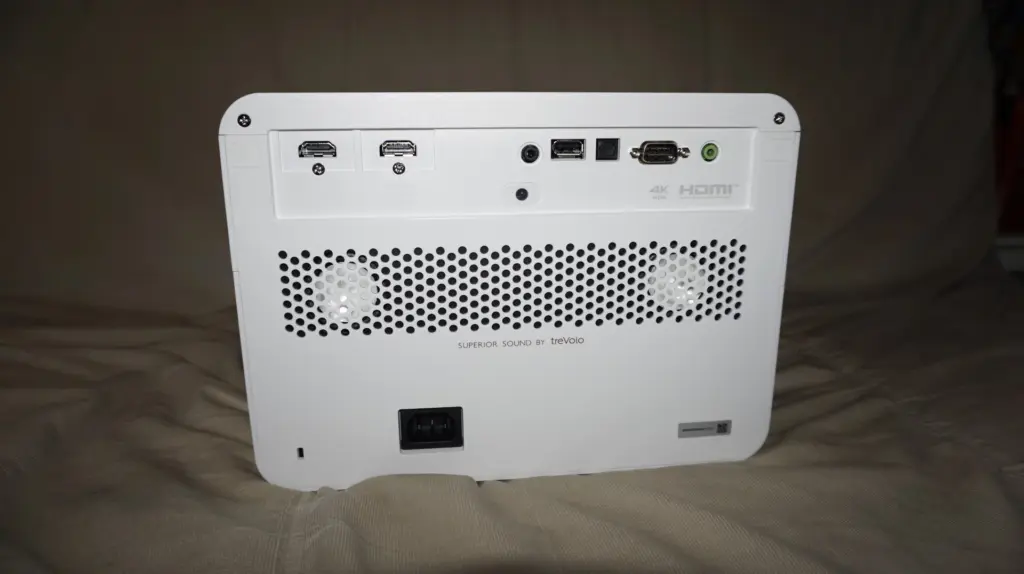
The projector has built-in speakers that are marketed as having Dolby Atmos capability. Their speaker setup is a virtualized audio solution intended to make content sound richer and more immersive than stereo on its own. If you have a surround sound system with Dolby Atmos support, BenQ’s streaming stick can send Atmos signaling through its eARC HDMI port back to your receiver. eARC (HDMI’s “Enhanced Audio Return Channel”) makes it possible for audio to be fed from your display back to your audio receiver without extra cabling.
Be aware that Dolby Atmos is limited to certain streaming content providers when run through BenQ’s streaming stick solution. For example, as of this writing, Dolby Atmos will work with Amazon Prime Video, but will not work with Disney Plus. My PC only sees BenQ’s audio system as stereo and is unable to recognize Dolby Atmos capabilities.
Image Quality
Resolution
The BenQ X3000i achieves its 4K resolution through pixel shifting. What that means is the projector is showing a 1080P picture, and is alternating images with offset pixels in a manner that is faster than the eye can see. It’s this rapid swapping and combining of imagery that builds the full 4K picture in our mind. The result is you are getting a sharp 4K image with pixels truly mapped in 4K resolution based on a modern form of interlacing that is relying on the eye and brain’s persistence.
It’s not the same thing, but on my Panasonic AE7000 projector, I liked to take 4K content and downscale it to 1080P because it was a bit sharper than 1080P alone. While the BenQ X3000i is delivering better results with finer details and image clarity, I thought the 4K upgrade over my previous projector would be more pronounced.
HDR vs SDR
Aside from resolution, the biggest limitation I had with my Panasonic AE7000 was it was an SDR (standard dynamic range) display. This was a problem because many streaming providers only included Dolby Atmos surround sound support with 4K HDR streams which meant I was out of luck. I got around this with a homebrew capture card design where I would take the 4K HDR content as it was being played and convert it on the fly to an SDR signal my projector could display through something called “tone mapping”. The content always looked great, and I was able to take advantage of the latest surround sound capabilities. Alas, those days are gone now. What could a REAL HDR projector do for me?
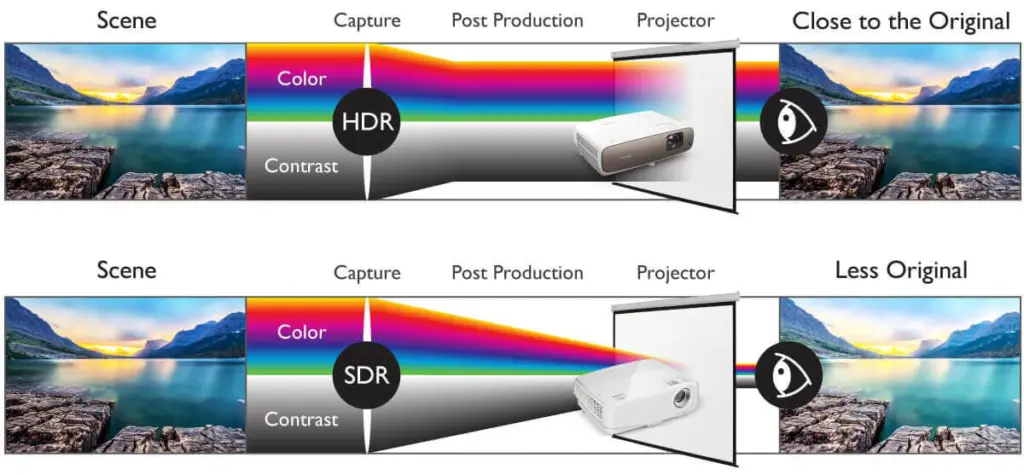
Modern projectors like the BenQ X3000i natively support HDR10. Benefits of HDR10 include a wider color gamut (the ability to show a wider range of colors than SDR) and exponentially more steps of contrast between deep black and bright white. The challenge with HDR10 is that different displays have very different brightness capabilities, so the demands of the content and the capabilities of the display aren’t always compatible with one another.
HDR is especially challenging for projectors because they are incapable of displaying a true black (the lowest end of the spectrum) or a white bright enough to match the specification. According to Projector Central’s calculator, based on my screen size and distance, the X3000i is projecting up to 160 nits (the brightness reflected off the screen). An HDR HDTV can display anywhere from 400 to a whopping 1,000+ nits (brightness projected FROM the screen). It’s hardly fair, right?
With so much variation across the display market, the solution is for the content to advertise the number of nits it is authored in, and for the displays to compensate for the differences with their own tone mapping technologies before showing the final image on-screen.
Unfortunately, projectors have yet another challenge. Unlike HDR televisions, projectors can have a wide variation of screen sizes, screen materials, and projector to screen distances. These variables all play a part in the precise brightness that will emanate from the projection screen – and there is no way to fully account for it.
Black Level
In other reviews, I’ve regularly read and seen comments that the black levels could be better – that the deep blacks look more like a dark grey than a black. While a dark grey is to be expected by most if not all projectors, I made a few discoveries in this regard.

First, when I received the projector, I had it set up closer to the screen while I was waiting for my ceiling mount in the mail. The blacks were indeed brighter than I expected. Once I got the projector installed further away from the screen (about 10’), those greys became significantly darker. I also noticed that the projector’s HDR brightness control had a dual effect of increasing highlight brightness and deepening blacks a bit further.
Then I compared the result to my Panasonic AE7000. While the AE7000 black level seemed a bit darker than the BenQ X3000i, the same could be said of the whole image. Also, the AE7000 is rated at 2,000 lumens of brightness compared to the BenQ X3000i which is supposed to be as high as 3,000 lumens. Factoring that the AE7000 is even further from the screen than the BenQ and has been beaten up with age and use – the X3000i looks about right.
DLP Rainbows
Unlike LCD which consistently shines red, green, and blue light through polarizers to a central image, DLP is a rapid succession of changing greys on a micromirror array combined with a carefully synchronized color wheel or LED light equivalent. So while our brain is getting a full image, it’s actually being delivered to us in bits and pieces in a way that is too fast for our eyes to see…mostly.
Some of us…myself included…possess a superpower that makes it possible to be aware of this process. By darting our eyes, we can see rainbow effects caused by full images being put together one color slice at a time.
The good news is this is only prevalent in high contrast scenes like when you have pure white on pure black. However, I was able to watch black and white movies without issue, so even then – there are probably limits on what will get affected. If you are like me, you will probably get used to it or eventually be dismissive of the anomaly altogether.
Get a Good Start With Connectivity
If you are upgrading your display from something less than 4K (e.g. a 1080P HDTV), make sure you are using “Premium High-Speed HDMI” (HDMI 2.0B) cables with the projector and your content sources. It’s not necessary to get special high-end brands or spend more than necessary – it’s just very important to have cables that fully support 18GB of bandwidth + Ethernet. Later version HDMI cables (e.g. HDMI 2.1) will also work. It wasn’t until I upgraded my HDMI cables that I was able to access all the possible display connection modes and was able to achieve a stable image with the projector.

If you are running from a streaming stick, use display mode YUV4:2:0 10 bit 60Hz or 59Hz. All broadcast and streaming content is mastered for this, and anything higher will just be wasteful. If you are running on a PC at 4K, YUV 4:2:2 at 10 bit is the best option for viewing HDR content. Choosing 12 bit is unnecessary because the BenQ X3000i is a 10 bit display.
Be mindful that a Windows PC may default to 8 bit RGB mixed with HDR turned on. HDR in 8 bit modes are actually SDR mixed with dithering to simulate an HDR result. Similarly, choosing YUV 4:4:4 8 bit on PC may SEEM to support HDR, but the result is still a simulation. These modes do look good, but they aren’t the full HDR you are paying for with this projector.
SDR Content
The BenQ X3000i provides a series of viewing modes depending on the nature of the content and viewing space: Bright, Living Room, Game, Sports, Cinema, and 3D. It’s best to be in a light-controlled room because if you require a brighter image, it also means you could end up with fewer contrast variations. Cinema is my favorite mode so far. Gaming and 3D mode are animals of their own, and I will discuss them later.
Television and Streaming, SDR
My source choices included a wide range of local cable TV, and streaming media like Netflix, Amazon Prime Video, and Disney Plus. All streaming sources were viewed on the Nvidia Shield TV Pro and / or the Google Chromecast + TV to confirm results.
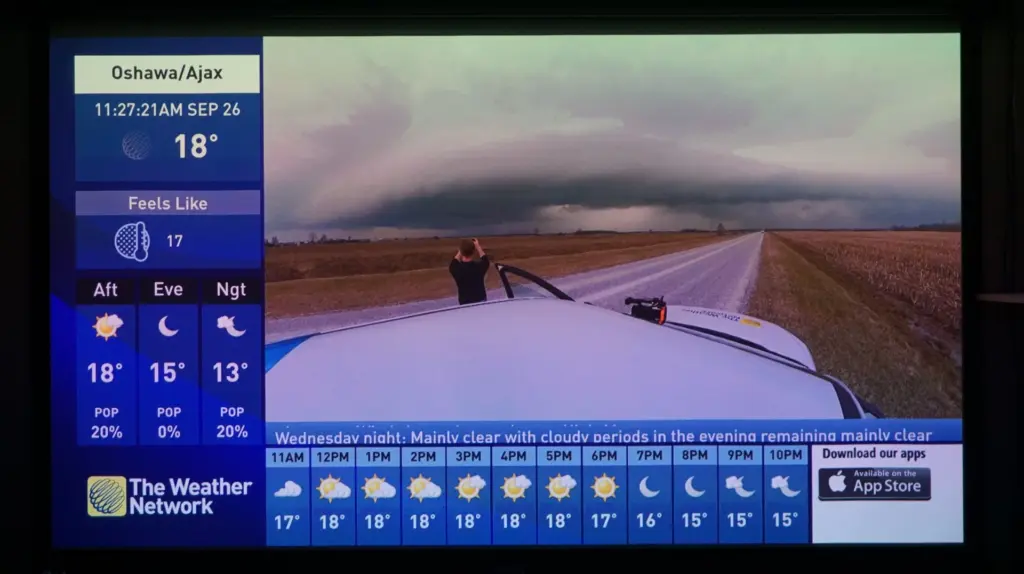
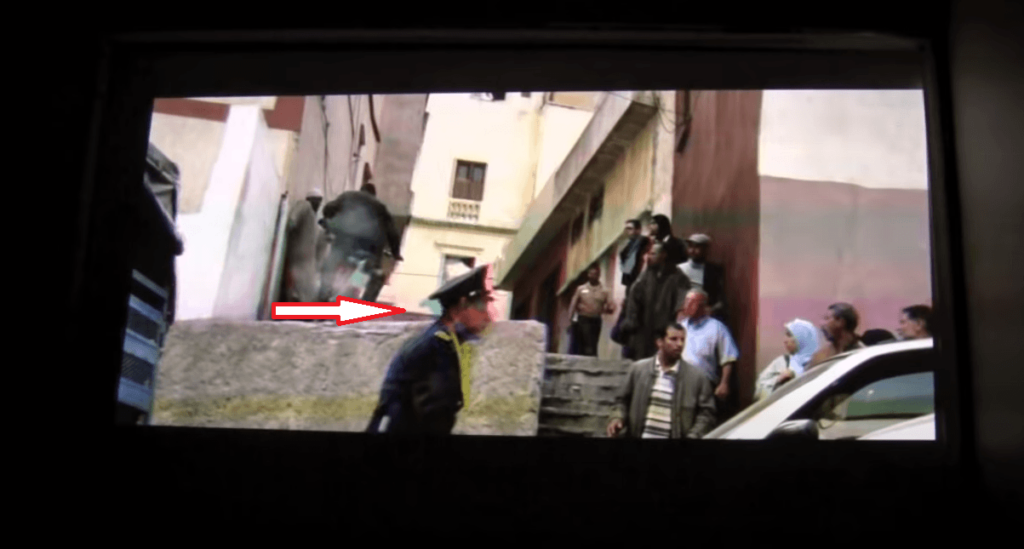
I’m really happy with the way SDR content looks on this projector. Through cable TV, most is 1080P resolution in nature, though I do have a handful of 4K (3840 X 2160) sports channels. It’s all sharp, easy to watch TV with the BenQ X3000i projector. The same could be said for streaming SDR content in both 1080P and 4K formats. Imagery is consistently bright, colorful, and uniform without needing special adjustments from one scene to the next.
HDR Content
Once the projector detects that you are in HDR mode, the X3000i’s display adjustment options change. While there are still contrast and brightness controls, the display modes are mostly replaced with HDR-specific options to help get the image quality you want / need.
It’s clear to me that the HDR ecosystem is still a bit wild west and the grey margin of misunderstandings and mistranslations can easily show up with the X3000i. While the projector does an admiral job with what it has to work with, the ecosystem in general seems be doing a disservice to what HDR could be.
The thing about HDR is it can’t be calibrated the same way that SDR can. The projector has certain brightness capabilities and its own tone mapping system to transform whatever HDR content is being sent its way into a great visual experience. For this reason, changing the brightness and contrast settings can hinder the projector’s tone mapping setup and it’s usually recommended to leave them alone.
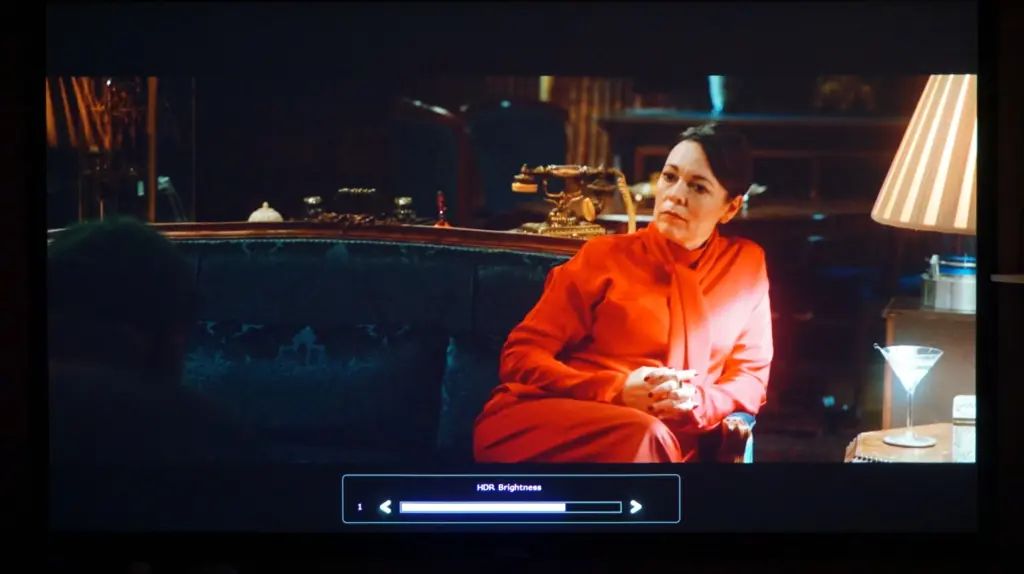
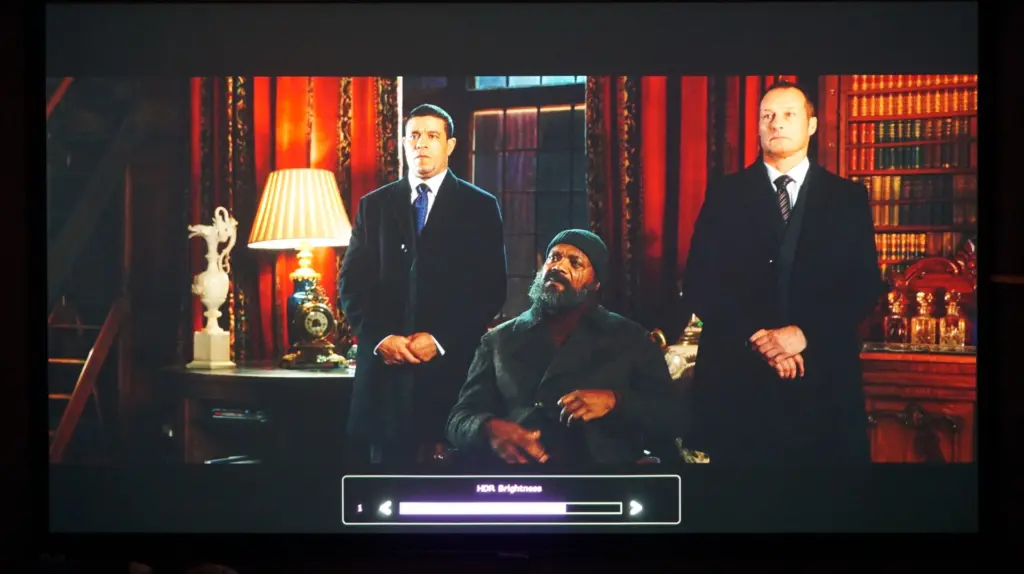
If highlights look washed out or too drab, BenQ’s answer is a special HDR Brightness control that shifts the mid-tones to where they are supposed to be. It’s a manual setting that is changed according to personal taste and the content you are watching. Fortunately, when HDR10 content is authored, its nit rating is consistent through the whole piece which means that if you find an HDR brightness setting you like for that given program, you won’t have to readjust it with each passing scene. However, you may have to change it again if you are watching something completely different.
I think the stand-out benefit with HDR10 on the BenQ X3000i is its wider color gamut. The jump of going from 8 bit to 10 bit color is an exponential difference in variation and vibrance, and this really stands out when content takes advantage of the capabilities.
Where I’m undecided is BenQ’s Wide Color Gamut (WCG) feature. This toggle makes it possible for the X3000i to display the full range of the DCI-P3 color gamut. Unfortunately, I find that turning this feature on makes imagery look less punchy and more muted. Other reviewers have pointed out a significant drop in projector brightness with this feature turned on, so that in itself may make it worthwhile to steer clear.
To make things more convenient, I wish HDR could have set and forget adjustments the way SDR needs to only be calibrated once for the duration of the projector’s use. Perhaps there could be a future workaround for the X3000i to have some kind of profile system that pulls up settings for each provider and content source.
Below are my content experiences with HDR10 so far.
Netflix HDR

The “Our Planet” and “Our Planet II” series are must-watch HDR10 viewing with the BenQ X3000i. Until I saw these series, I was uncertain that there is a meaningful advantage to HDR10 content – at least through this projector. All the programs are ultra colorful and have a certain glow and radiance that I think is unique to HDR. I was both pleased and relieved that things looked so good!
“All Quiet on the Western Front” is another visual experience that showcased the projector’s crisp 4K sharpness and worthwhile HDR capabilities. The same goes for Netflix’s “Lost in Space” series.
That said, unless the content is truly authored with HDR capabilities in mind, I’m not sure it’s always worth it with the X3000i. For example, “Six Underground” looked good in HDR, but not necessarily superior to what SDR would have delivered. “Don’t Look Up” seemed a bit dark even after increasing the projector’s HDR brightness, and the “Joan is Awful” episode of Netflix’s Black Mirror also needed to be adjusted. It’s possible that SDR could have done just as well without the inconvenience.
With an understanding that not every program will explode with color, Netflix has a strong showing of programming that works well with the BenQ X3000i.
Disney Plus
While Disney Plus probably has the largest library of streaming HDR10 content that is readily available, almost all of it looked terrible out of the box. Just about everything was dark and drab compared to the SDR feeds. Fortunately, this was all fixable by increasing BenQ’s HDR brightness and regular brightness adjustments. This made a huge difference!

For example, after adjustment, Star Wars: The Last Jedi was excellent with both dark scenes as well as explosions and highlights. My HDR expectations were higher, but I don’t think this is BenQ’s fault as not everything is authored to be as vibrant as Netflix’s “Our Planet II”!
I got the same results with the Marvel movies which were all very dark unless I compensated with the brightness and HDR Brightness controls.
As good as the final images are, I have to ask: will most customers manually tinker their HDR video settings? Or will the start-up imagery be so disconcerting that they just return their projector before giving it a chance?
Amazon Prime Video HDR
Prime Video has some good HDR programming with “The Boys”, “Carnival Row”, “Upload”, “The Rings of Power” and more. Still, similar to Disney Plus, it helped to manually adjust some of the HDR content to look its best.

The stand-out programming for me was Lord of the Rings: Fellowship of the Ring. Running from an Nvidia SHIELD Pro, I could immediately see the warm benefits of HDR10 over the SDR version of the stream. I bet there is a wide range of other HDR movies that deliver similar results on Amazon Prime Video.
YouTube HDR
Believe it or not, YouTube was easily one of the best resources for HDR video testing that showcased what the BenQ X3000i can do. Almost putting Hollywood to shame, HDR-tagged videos effortlessly demonstrated the potential of HDR and the X3000i’s capabilities without special adjustments or inconveniences of any kind. I wish all content sources could deliver HDR as well and as conveniently as YouTube does.

To get YouTube HDR to work, you have to access it through a Google Chromecast + TV unit or a Chrome compatible browser. The Nvidia Shield doesn’t have the codecs necessary to make HDR play in YouTube. You will know HDR is working with the HDR indicator in the YouTube resolution dropdown.
PC HDR + 4K BluRay
For my 4K Bluray tests, I used a PC with the following specs:
- • AMD 7700X CPU, 32GB RAM
- • Nvidia RTX 3090
- • Potplayer
- • Madshi MadVR video renderer
Combined with MadVR, Potplayer is able to play 4K HDR blu-rays, and tone map them to the capabilities of the attached display. In my case, I tone mapped the Blu-Rays to an HDR10 capable display with 100 nits of brightness.
My source content included Hacksaw Ridge, Apollo 13, The Bad Guys, Transformers, and Transformers: The Fallen on 4K UHD Blu-Ray. In all cases, the content was definitely sharper with the X3000i projecting every crevice and wrinkle. The projector’s 4K resolution is definitely doing its job here and it stands out.

Source: Hacksaw Ridge, HDR10
HDR quality was a more difficult area to judge, and I think I know why. Remember that my prior experience was to take HDR content and to tone map it for my SDR Panasonic AE7000. Armed with an Nvidia RTX 3090 with all kinds of dithering and upscaling technologies at its disposal, the AE7000 had a lot of advantages to close the visual gap.
In the case of the BenQ X3000i, aside from a wider color gamut and more resolution, the brightness capabilities are somewhat comparable to my Panasonic AE7000. In this case, the BenQ X3000i is projecting a 4K Blu-Ray image that is indeed richer with a wider color gamut, but the outcome isn’t as far ahead as I thought it would be. Why? Because a projector’s HDR capability is more about its ability to tone map than it is about the projectors physical capability to show something new. My high-end PC is probably a better tone mapper than anything embedded on a projector chip, so it’s no wonder that the results are comparable.
Was the BenQ X3000i a worthwhile upgrade for 4K UHD Blu-ray? If you own a 4K Blu-Ray Player, probably yes because of the projector’s built-in tone mapping, resolution, and wider color gamut. If you own a gaming PC with your own high-end tone mapping capabilities for 4K Blu-Ray – still yes, but the upgrade might be more marginal depending on what you’ve owned before.
Games, Games, Games
It was a stroke of genius for BenQ to market the X3000i as a gaming projector. If Hollywood is indeed missing opportunities with their implementation of HDR in content, the gaming industry is picking up the slack with wildly colorful experiences.
While the projector supports 1080P gaming up to 240Hz, you are most likely going to be gaming at 4K resolution in HDR with the BenQ X3000i.
Here are some of my experiences so far:
Star Wars: Jedi Survivor
A third-person perspective game, Star Wars: Jedi Survivor lends itself well to the BenQ X3000i. Its wide terrain, lush and varied environments, and exploratory immersive nature makes it a strong fit. The BenQ X3000i handles both dark and bright environments well, and the game shines on the big screen.

Jedi Survivor was my first introduction to gaming with high dynamic range, and the moment I turned HDR on, I was sold. It’s not just that the imagery was more vibrant and colorful – the HDR seemed to add unique details that weren’t previously possible. For example, light sabers didn’t just physically exist on-screen; they emanated with HDR variation and dazzle. The same goes for skylines and terrain – it just worked.
Flight Simulator 2020
Arguably the most visually stunning flight simulator in recent years, this is a go-to staple for virtual reality gamers. It also looks excellent on the big screen mixed with the right surround sound setup. Combined with ray tracing on my RTX 3090 – even more so.

Similar to Star Wars: Jedi Survivor, activating HDR brought with it a significant visual improvement. The airplane details were more saturated and fuller, the sunlight on the ground and buildings seemed more true to life, and everything just looked a lot richer than previously possible.
Star Wars: Battlefront II
Even though Battlefront II is a few years old, this first-person shooter’s most recent release and patch history is a geekfest for Star Wars fans. Capturing the nuance and detail of popular Star Wars environments and characters, it’s a must-experience battle royale I play on too regular a basis.

Even though this game is a few years old, the X3000i’s extra layer of HDR gives the game an added sheen and luster. The HDR shows itself well in the games reflective surfaces, rich colors, and widely varied environmental detail.
Stereoscopic 3D Spport
Sold separately, you can buy DLP 3D shutter glasses for the BenQ X3000i. Any generic 144Hz DLP brand should work provided they synchronize with a flash of green color rather than infrared.
Stereoscopic 3D mode is limited to resolutions up to 1920 X 1080P at 120Hz, though the projector’s built-in 4K upscaling still works. It’s also important to turn off the HDR functionality as that will break the stereoscopic 3D compatibility.
The BenQ X3000i supports various forms of side by side formats, page flipping, and 3D Blu-Ray frame packing. Stereoscopic 3D support on PC is very limited now, so you are most likely going to be doing “side by side” mode with S3D compatible games.
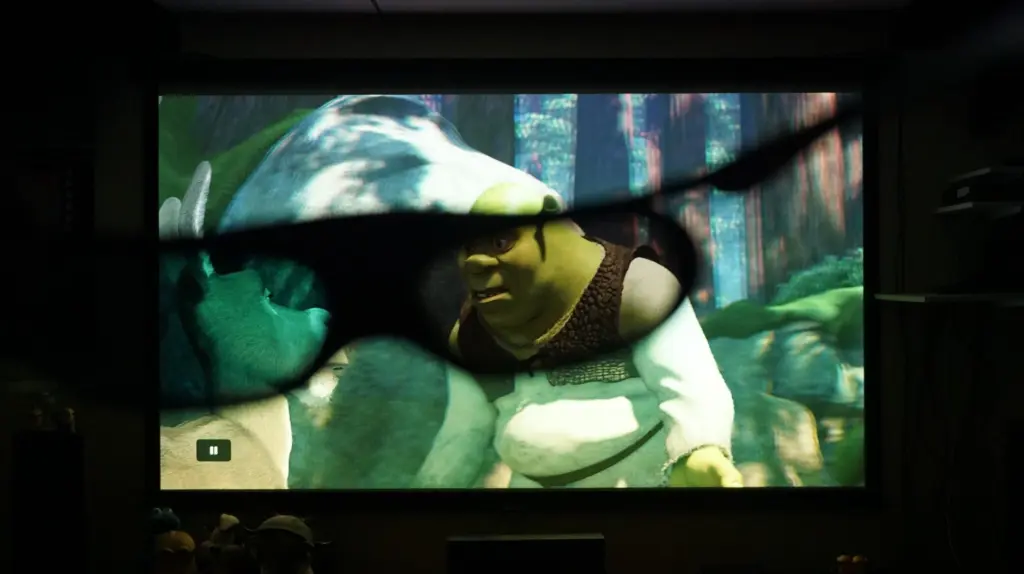
I tested the PC version of Shadow of the Tomb Raider which has native stereoscopic 3D support, a series of Shrek 3D Blu-Ray disks on my PlayStation 4, and various side by side movies on YouTube.
The 3D results are very good. There was little to no cross-talk or ghosting between the left and right views, the image wasn’t too dark to watch comfortably, and the big screen lends itself well to a good stereoscopic 3D experience. If the image does happen to be a little dark, the projector’s standard brightness controls are helpful in getting the picture to where you need it to be.
Conclusion
So what did this wild journey teach me about home entertainment for customers like myself?
First, there have definitely been major advancements in projector technology. The BenQ X3000i has proven to be a fantastic follow-up display for my ailing Panasonic AE7000. It’s a pleasure to use, most content looks great on it, and the LED technology that makes the projector tick is very durable and easy to maintain. It was a wise choice for me; someone that needed an all-in-one solution that is much better than average for their home cinema and gaming setup.
I do wonder if there should be a standard black level expectation or an easy to use measuring stick to know what a projector is delivering in this regard. While other reviewers have commented that the X3000i’s black levels could be better, my results were comparable to my earlier cinema projector which is fine by me. It’s possible that tone mapping errors could be contributing to greyer blacks, or maybe it’s the fact that projection results can change according to the screen, the projector to screen distance, and the nature of the content. OR…maybe projector blacks have gotten deeper over the years, and I just didn’t know about it!
For the average customer like me, I thought the projector installation would be a lot easier in this day and age. My Panasonic’s lens shift capabilities were sorely missed, and I was very fortunate that I was able to get the BenQ X3000i installed as cleanly as I have. The projector does such a good job with image quality it would be criminal if its results were undermined by a misaligned or haphazard installation. If I hadn’t planned ahead and invested the hours to get things right, the results would have been lackluster. Will other customers be equally patient to go through these efforts?
For gamers, projection definitely has a strong value proposition. The BenQ X3000i delivers crisp and colorful SDR and HDR 4K imagery that looks great right away. While there are several gaming modes to choose from, what’s key is that the imagery consistently looks good and is delivered in a low latency format. My 55” HDTV is a postage stamp in comparison, and I can’t imagine going back to that!
Stereoscopic 3D support was a pleasant surprise. I’m hoping Hollywood continues to put out 3D Blu-Rays and stereoscopic 3D content sources because consumer projection is finally getting to where it needs to be. My S3D experience far surpassed what I could do with my older Panasonic AE7000. Imagery was excellent with a naturally bright picture that is easy to adjust. The only caveat is compatible DLP 3D glasses need to be purchased separately.
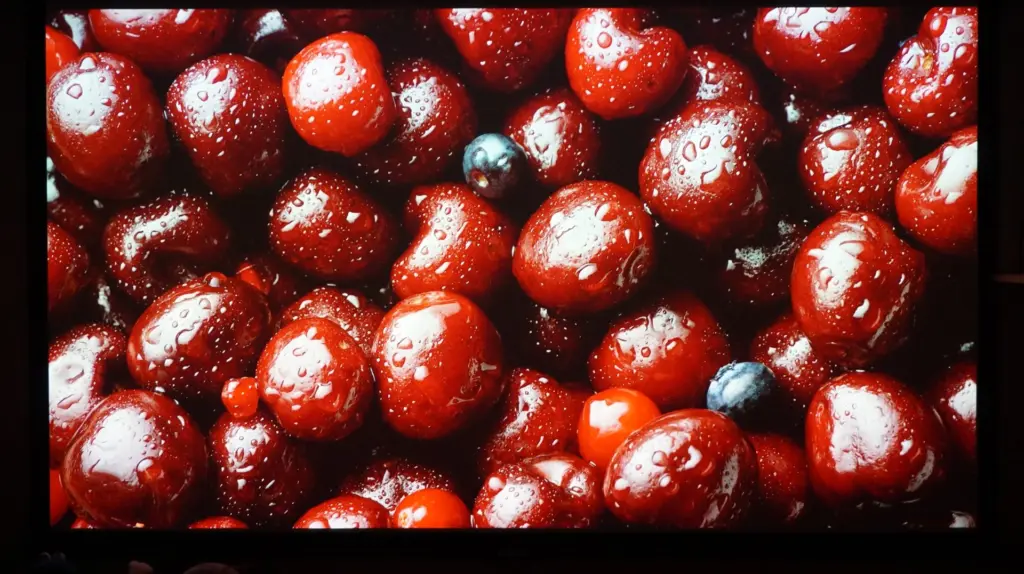
In general, while SDR content is as stable and reliable as ever, I do believe that Hollywood has work to do when it comes to disseminating HDR the way it’s meant to be seen – especially with streaming. For example, I can almost guarantee that pulling up any HDR video on Youtube will be glorious. Things as simple as a bowl of grapes or a domestic cat look stunning in HDR – generations ahead of anything I could do with my earlier projector, and completely effortless too! In contrast, I’m at a loss as to why the moment I engage with tentpole content like big budget movies and brand name streaming services, that stunning HDR luster is a mixed bag. I found that some content only looked marginally better than regular SDR versions, some required me to adjust my projector to be watchable, or with no rhyme or reason – some looked fantastic.
While I know it doesn’t take a lot of effort on my part to occasionally press a few buttons to bump up the brightness here and there, I also know that it would be nonsensical for me to have to adjust my TV with each channel change. Shouldn’t HDR experiences be equally consistent from one provider and one piece of content to the next? As it stands, my 4K UHD Blurays being video processed by my gaming machine along with HDR videos I found on Youtube were the exception. How is this possible? Why are Hollywood’s streaming outlets so inconsistent when it comes to HDR?
Maybe the way to look at the problem is in an ultra-bright TV-dominated market, projectors don’t get to rule the world. Instead, they are forced to live in it with innovative hacks and tone mapping workarounds. If true, I think this contributes to a missed opportunity for Hollywood to sell to customers like me, and I’m hoping that their industries can take steps to bring more balance to their playing field. In the meantime, companies like BenQ can make it easier for customers like me by adding more recordable HDR color profiles so changing between programs is more convenient.
Installed!
In summary, even though installing and optimizing my new BenQ X3000i projector needed hours of research and fiddling, the extra time was a small price to pay for sharp 4K imagery, bright accurate colors, and fun entertainment experiences on the big screen…MY big screen. Suffice to say, consumer projection is still the best way to go big AND go home.